
[No. 100]
Design
Welcome to my 100th blog entry
It arrived sooner than I thought. I found out as I was setting up the new blog structure on Framer which was less tedious than I thought.
If you’ve been keeping up, you’ll know that I’ve been rebuilding my new website. The foundation has been set, and now I’m onto the next phase of the project: migrating my content from Squarespace. For a while, I believed that the CMS on here was simple, effective, and all I’d ever need. Glad to say that I was wrong, because the exposure to Framer has made me think otherwise about blogs.
At first, I wasn’t looking forward to it because I knew it would be mind-numbingly repetitive. Imagine revisiting every blog post to copy and paste every title, excerpt, tag, body and SEO copy. 100 times.
That did not spark joy. I knew there had to be a better way, so I went looking.
Introducing: the CSV
It’s short for Comma-Separated Values. I literally just looked that up.
It’s a text file format that saves data in the form of spreadsheets, and it’s the way I’ve how I moved my content data in one fell swoop. However, on Squarespace, they provide something else: an XML (Extensible Markup Language) file. Basically the same thing as a CSV, just more programme-based so it doesn’t look as legible.
The good news is that there are plenty of file converters online which can turn your XML to a CSV. It’s well worth the effort because this file format’s going to save you hours, maybe even days, of your time from migrating your works.
Here’s how:
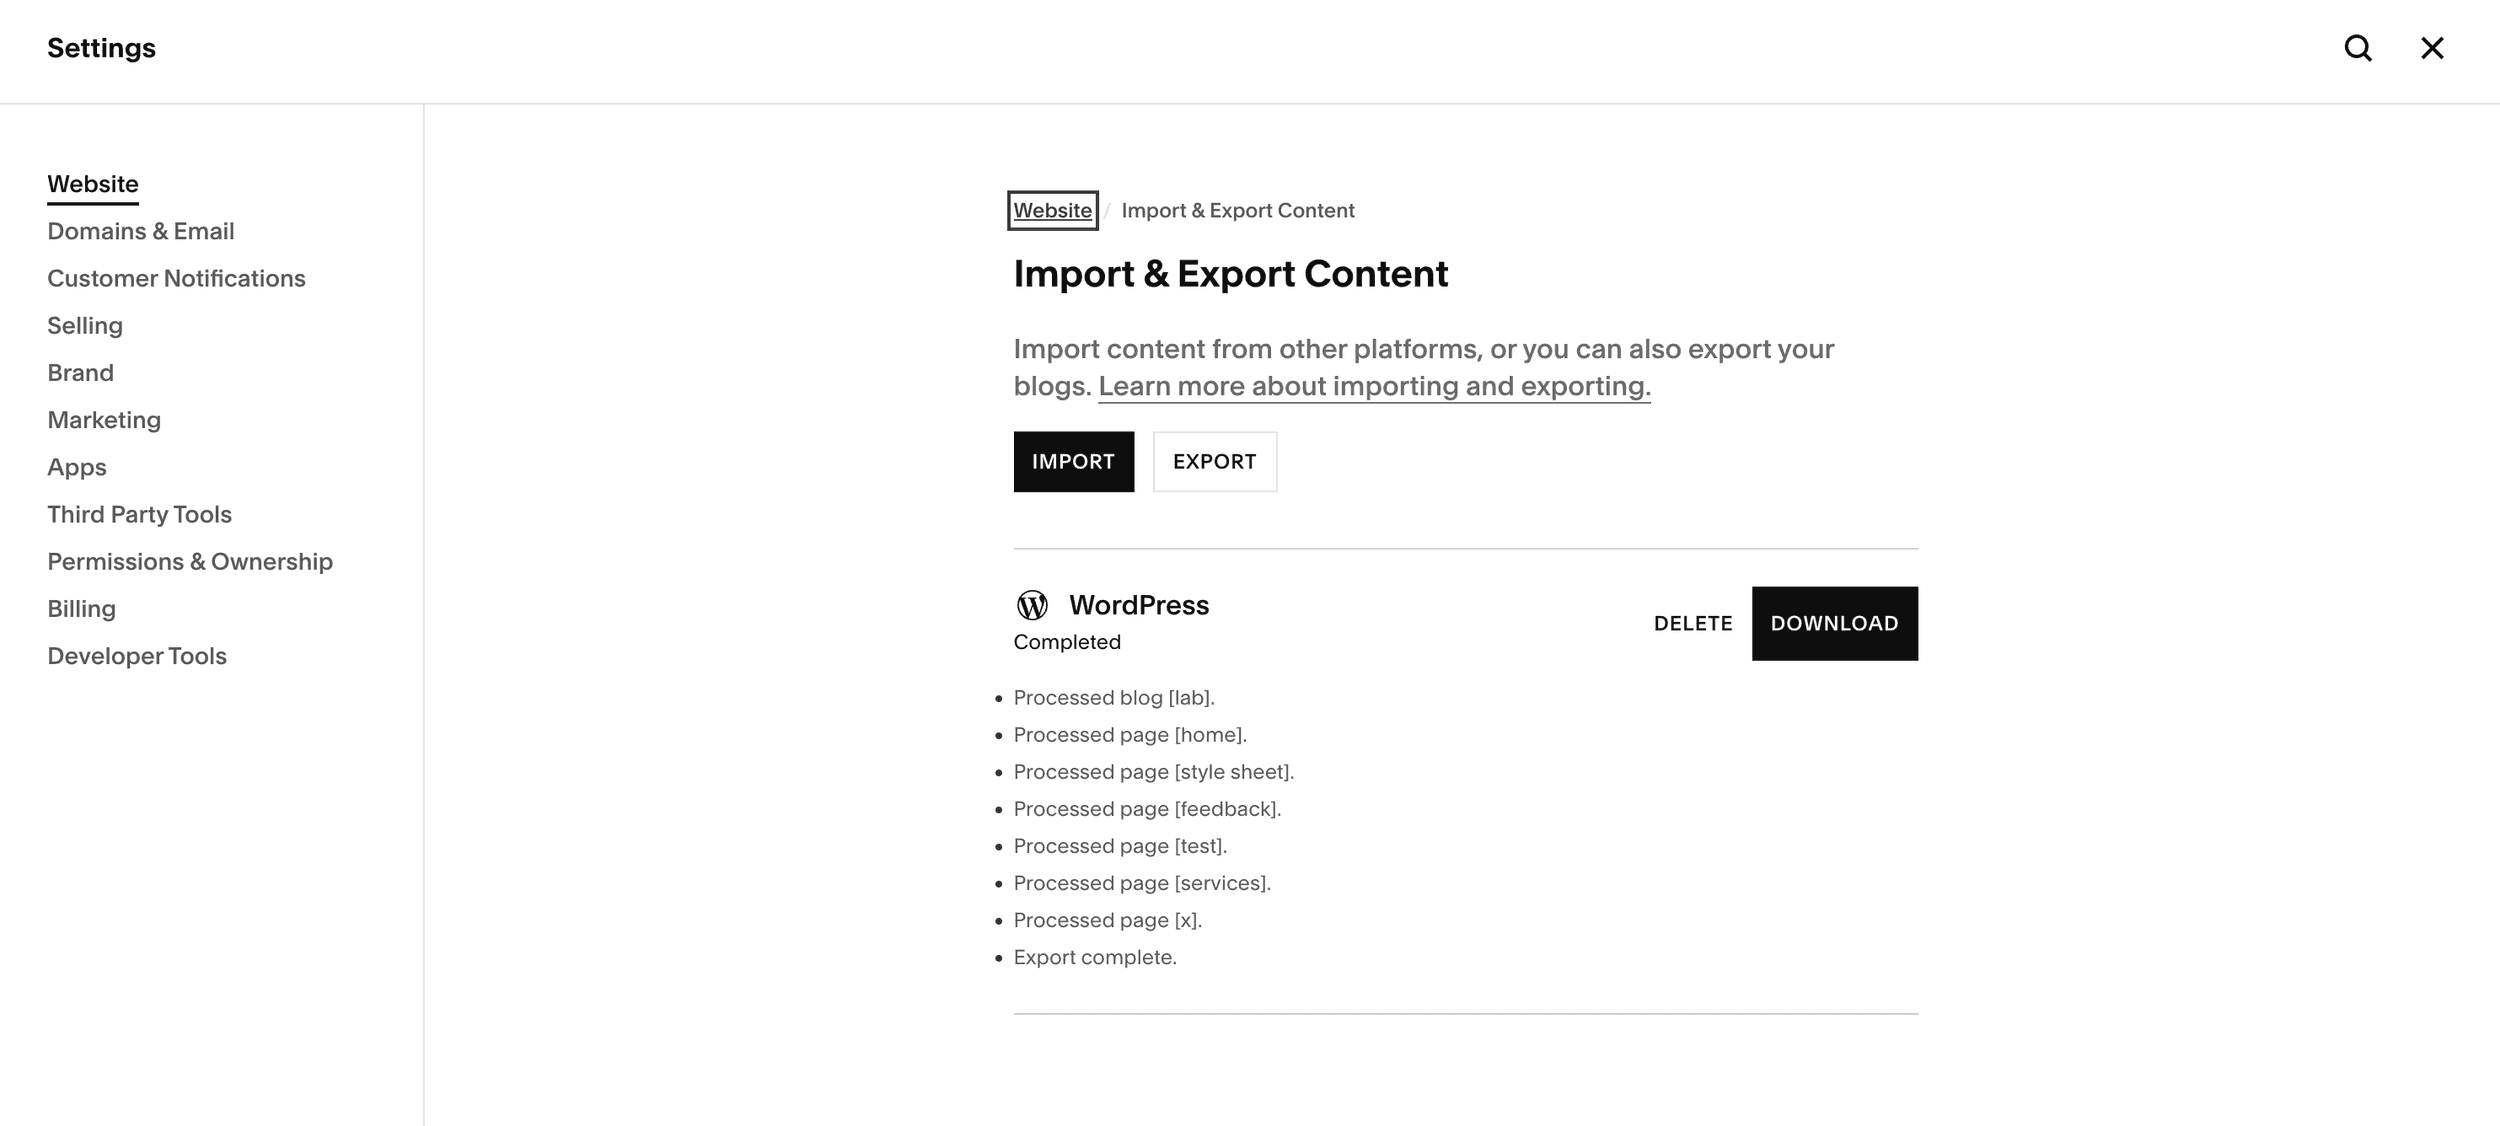
Exporting your content from Squarespace
1. Locate the CSV export button on your website
On Squarespace, it’s in your Website Settings that you’ll find in your Dashboard. Under the Website tab, you’ll find Import & Export Content. This is where you’ll be able to export your content.
2. Download it
Give it a moment to export your data. Once done, it’ll show up as a Wordpress Success message which you can download.
3. Convert the XML file into a CSV
Most website builders won’t recognise the XML file on their platforms, so make sure to convert it to a CSV. Do a quick Google search and you’ll find plenty of XML to CSV converters. Heck, even AI can do it for you. Do it your way.
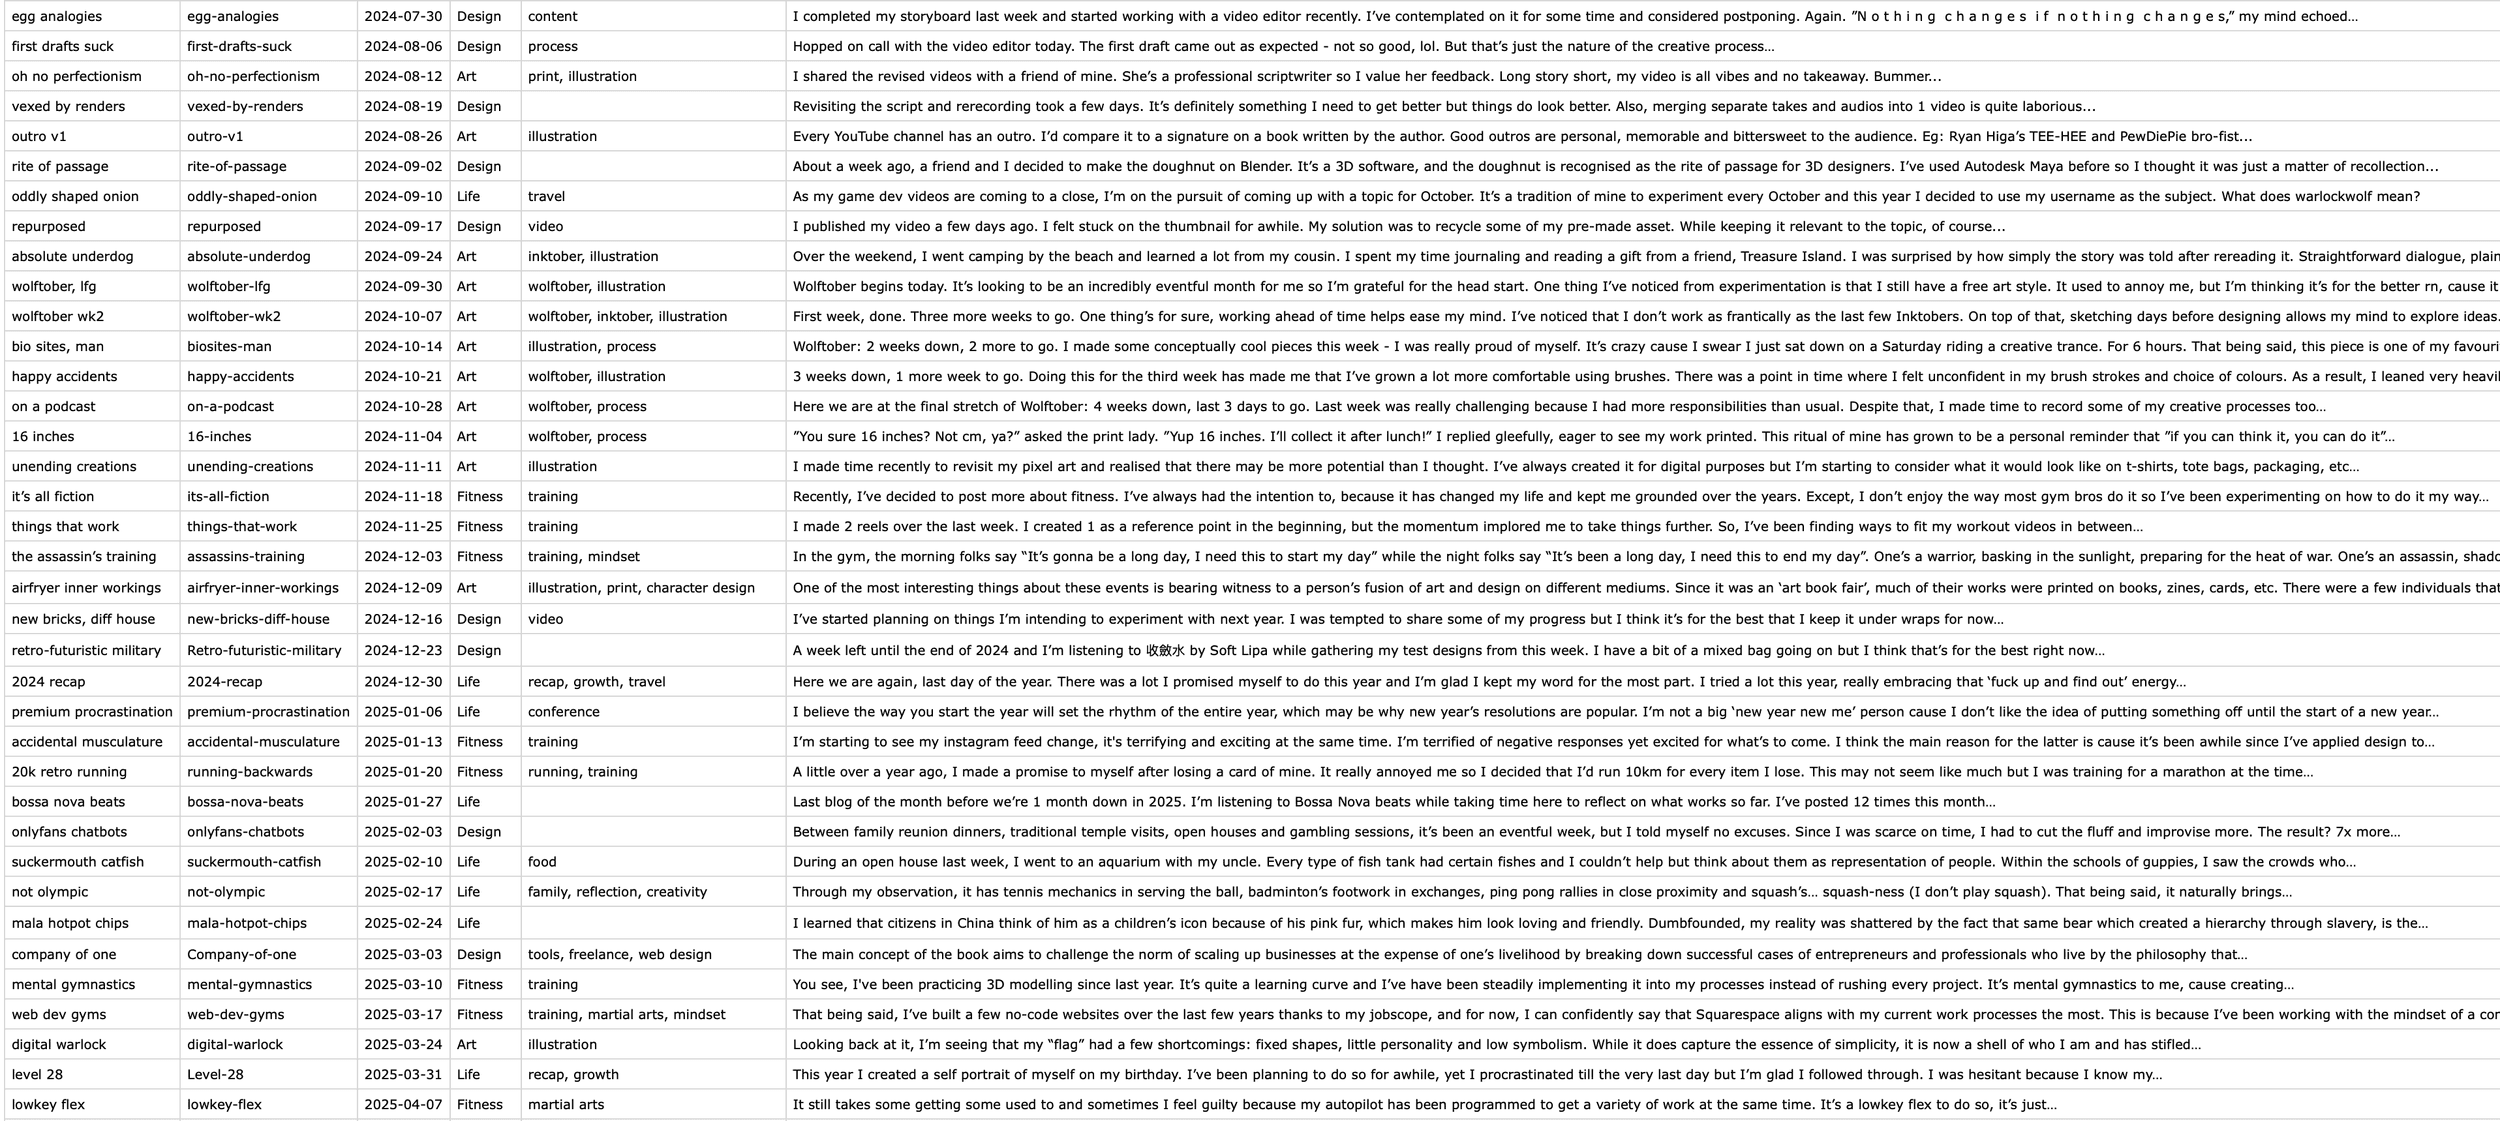
What the CSV file will look like
4. Open the CSV file
This is where things get interesting because it’ll evidently expose which parts of your content you’ve been neglecting most. For me, it was my title tags and meta descriptions. Both of which are worth improving on in the coming update for SEO optimisation which brings me to:
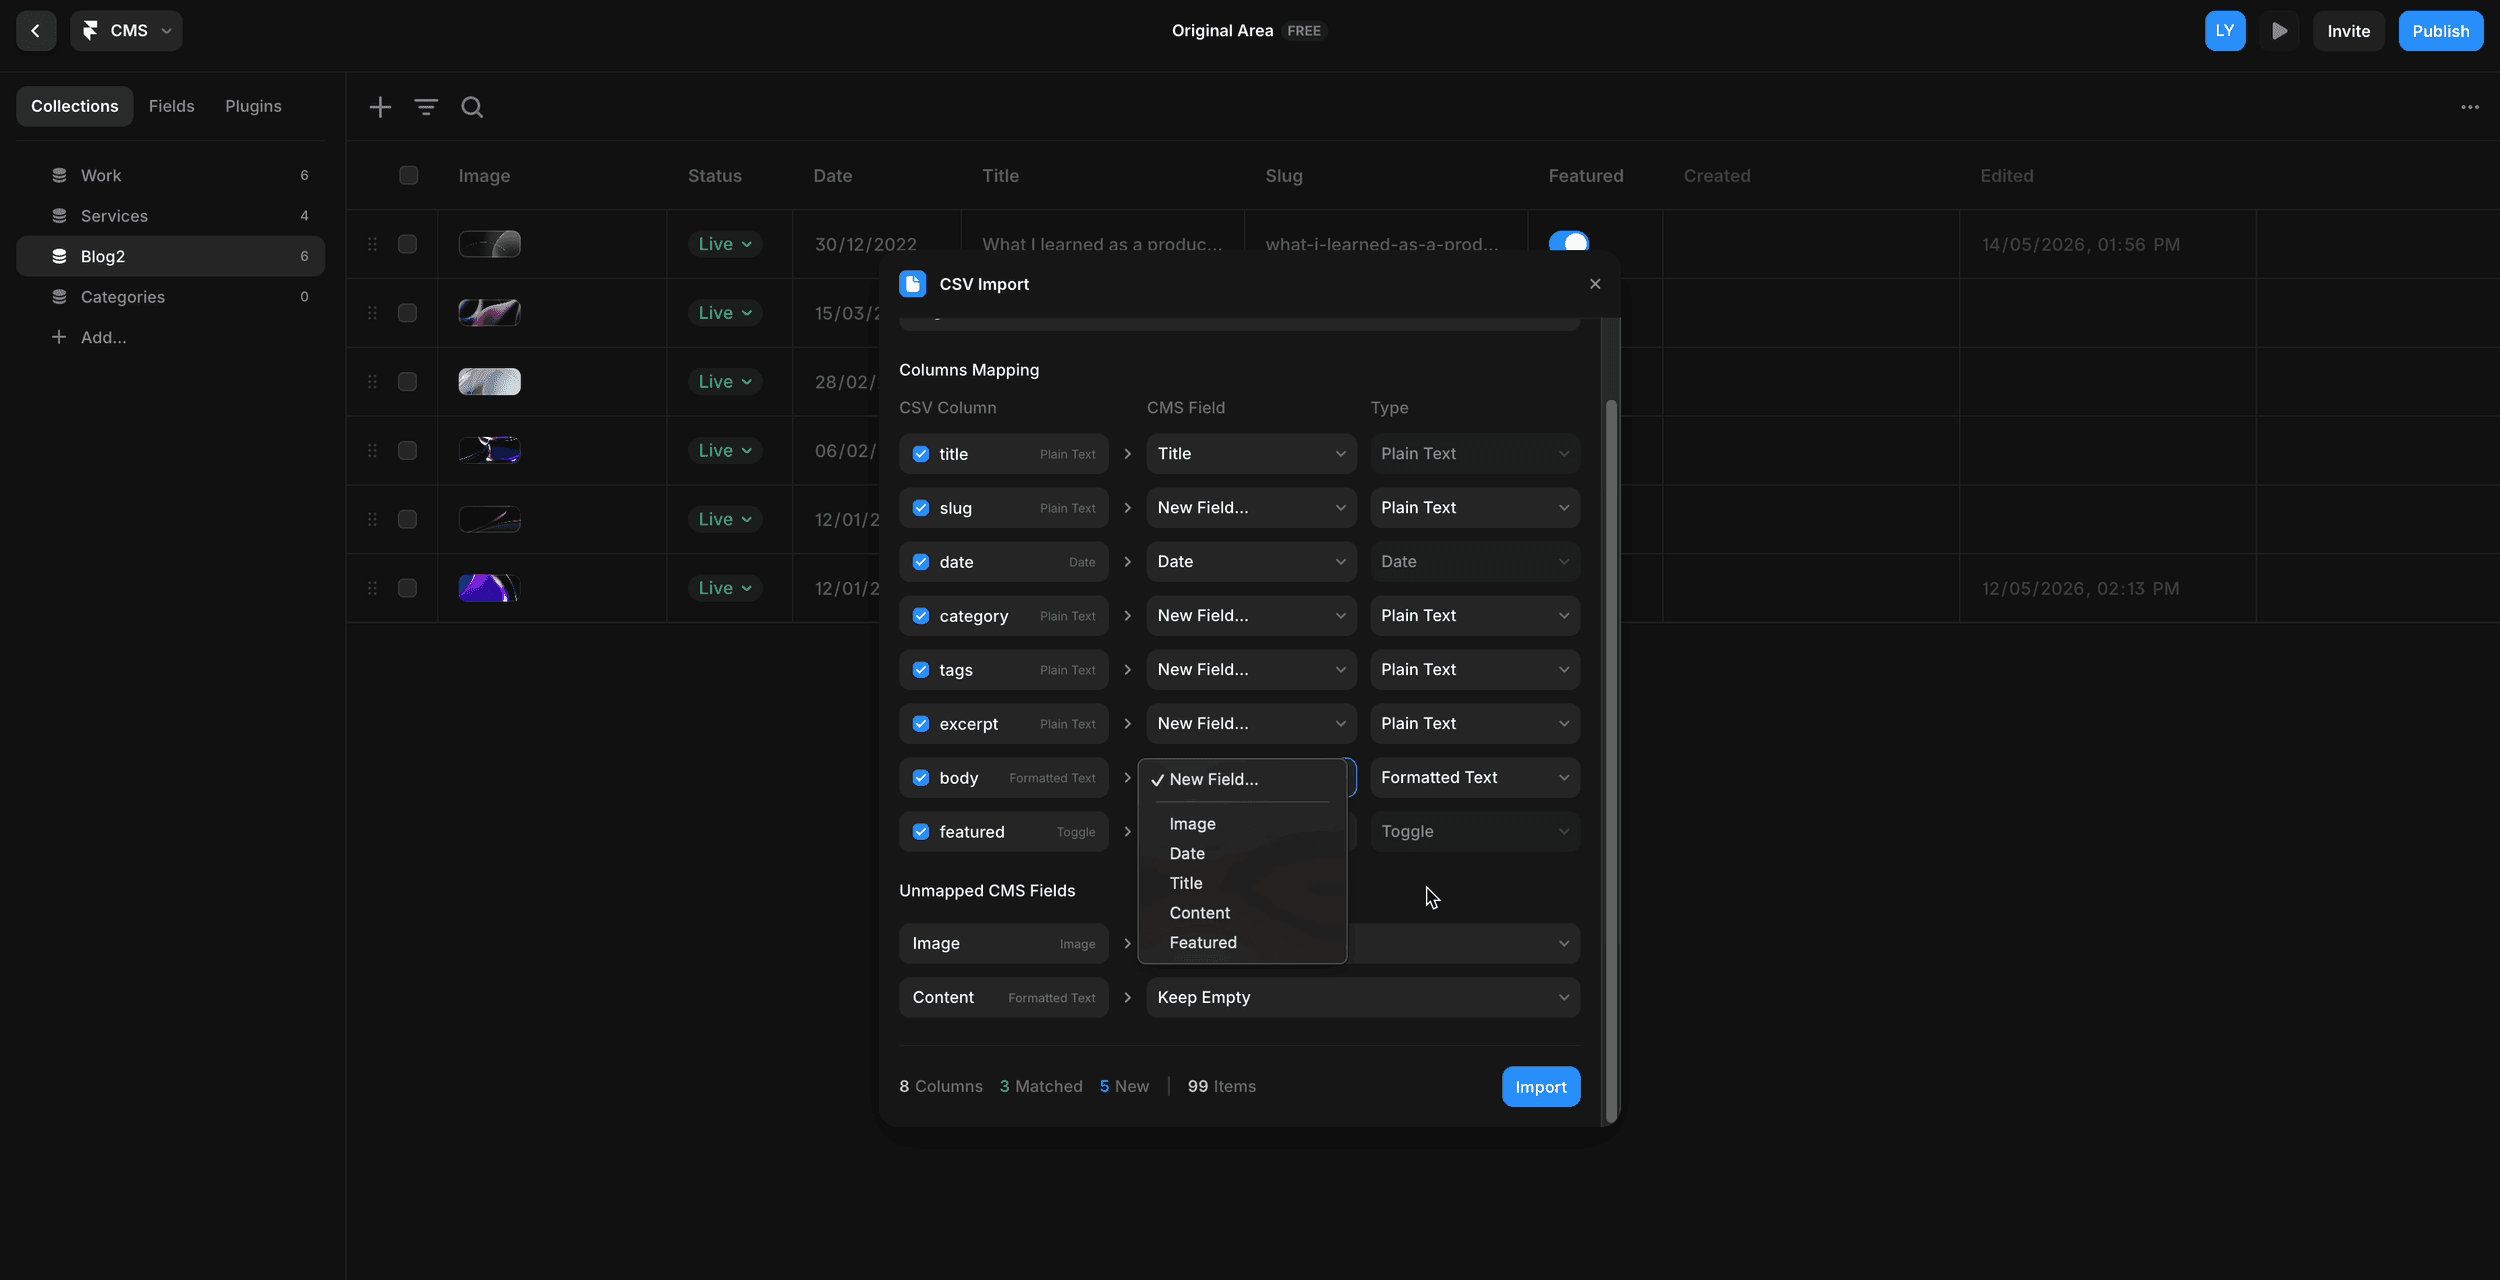
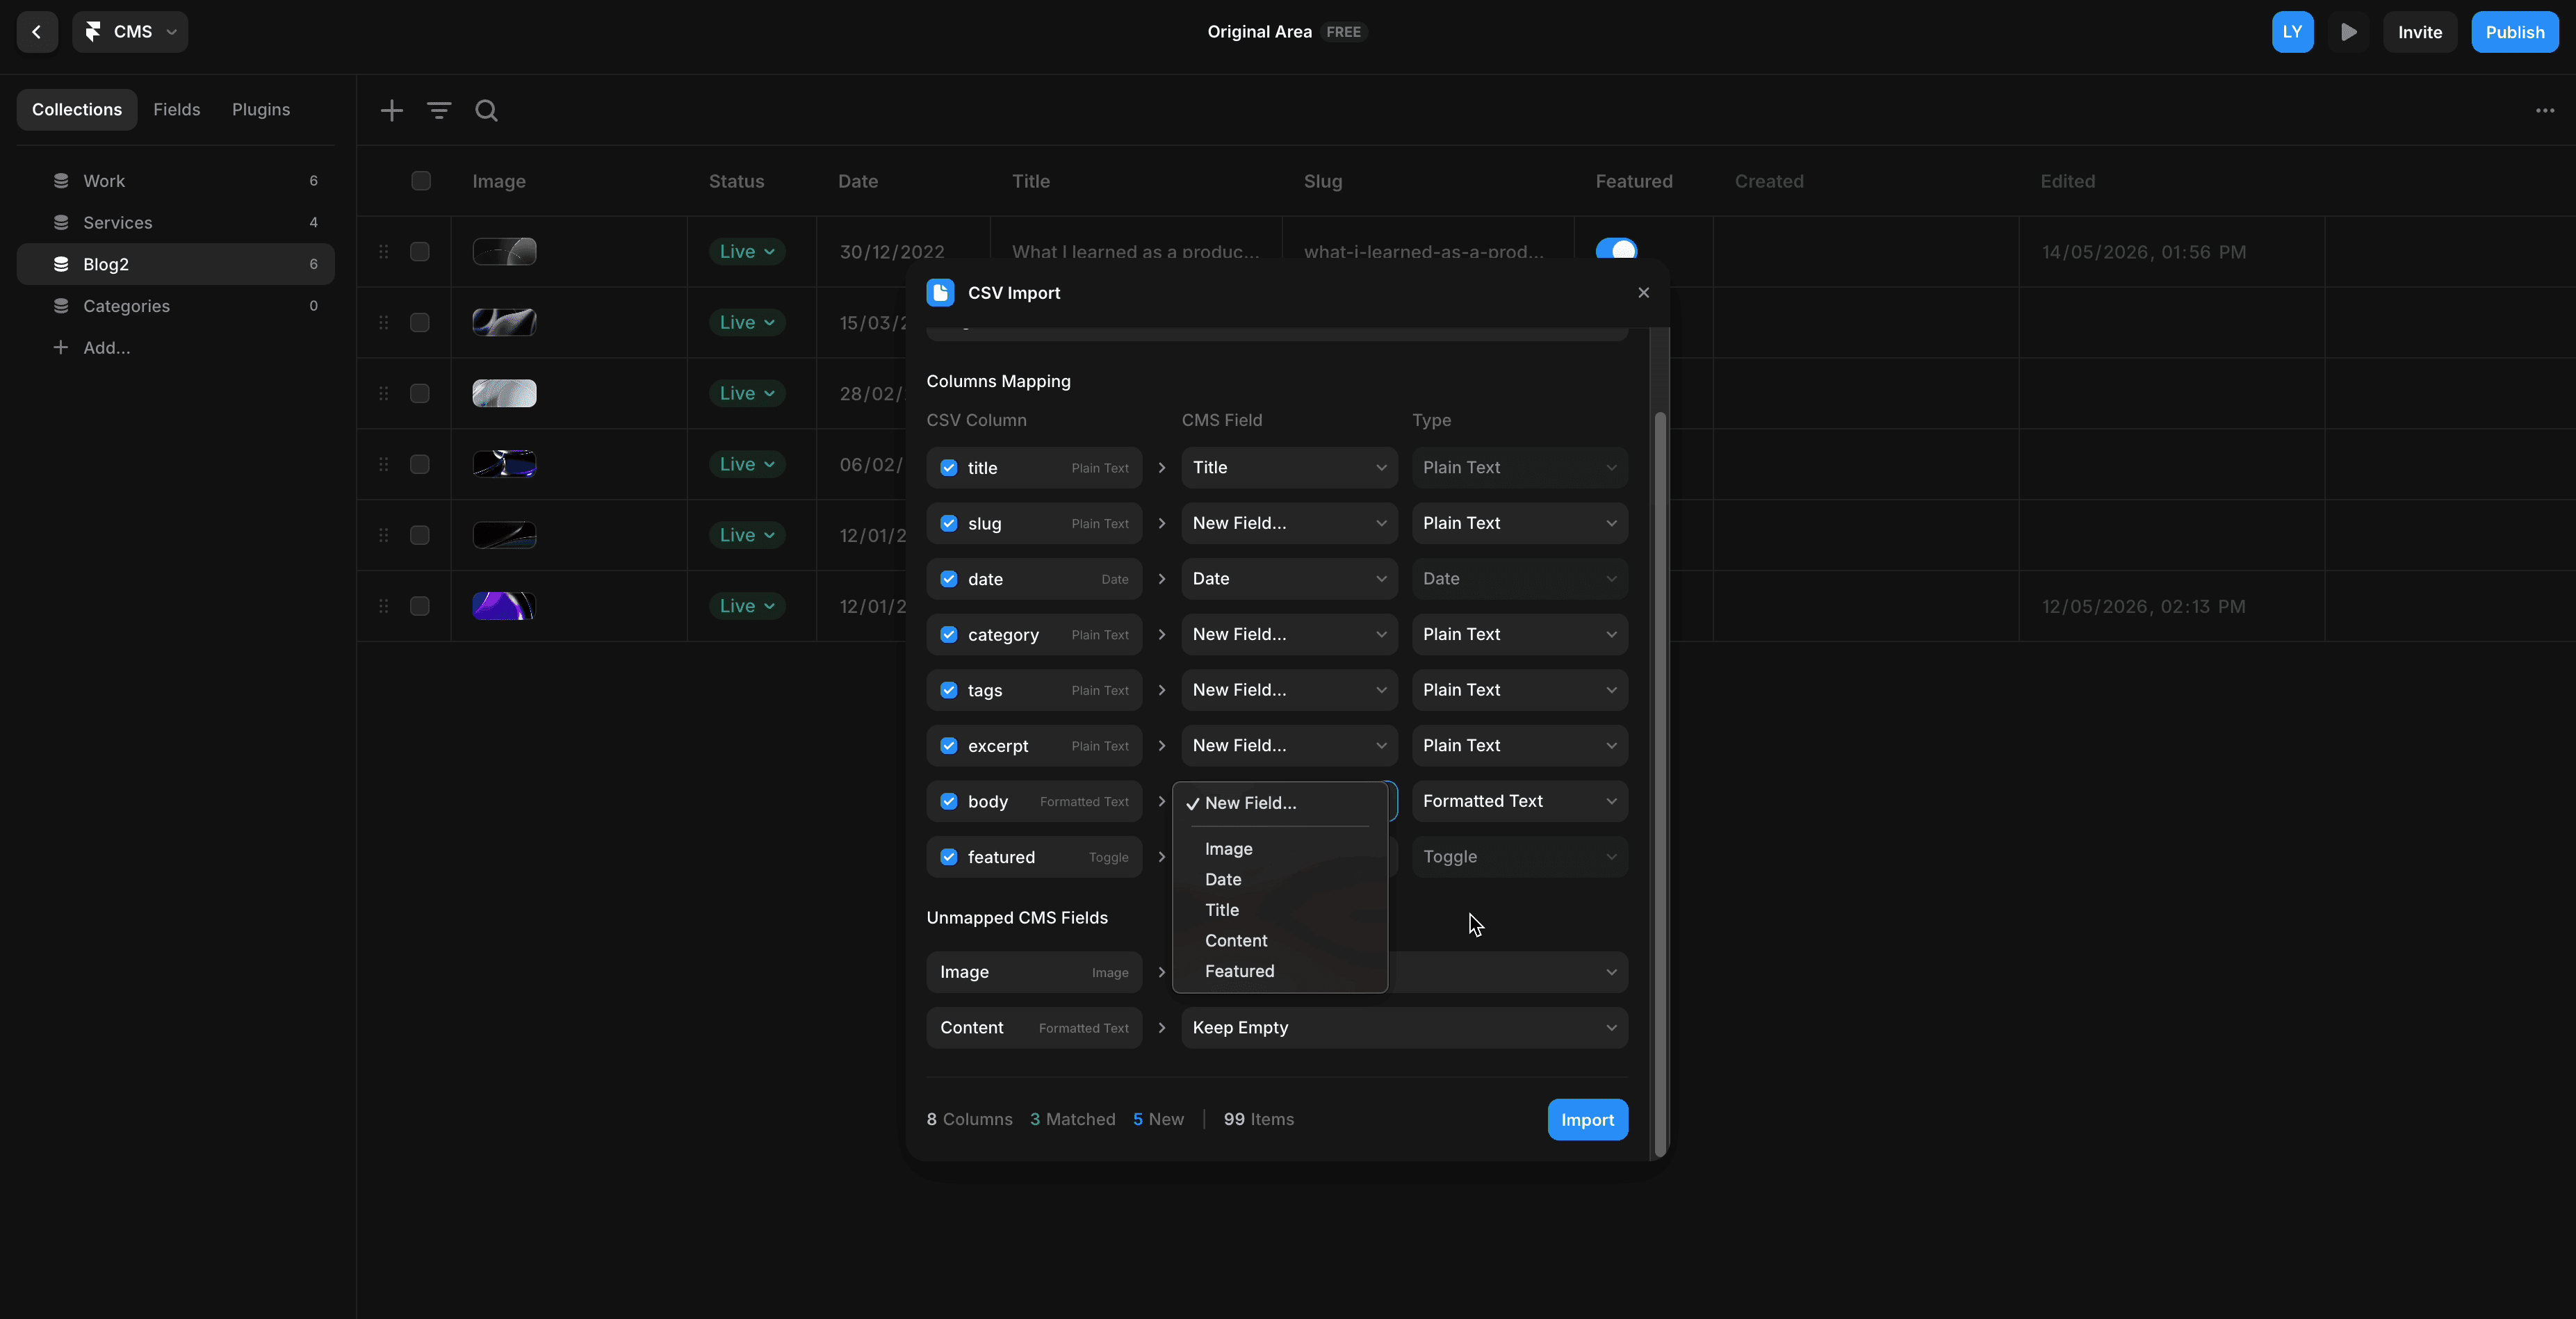
Making edits on the CSV Import fields look like this
5. Upload, organise and edit your CSV
What I’m learning on Framer is that you can introduce new data fields within it which can further categorise the database based on your preferences. Personally, I’ve decided to add a number tracker and category tag, so that my readers can find what they’re looking for more efficiently.
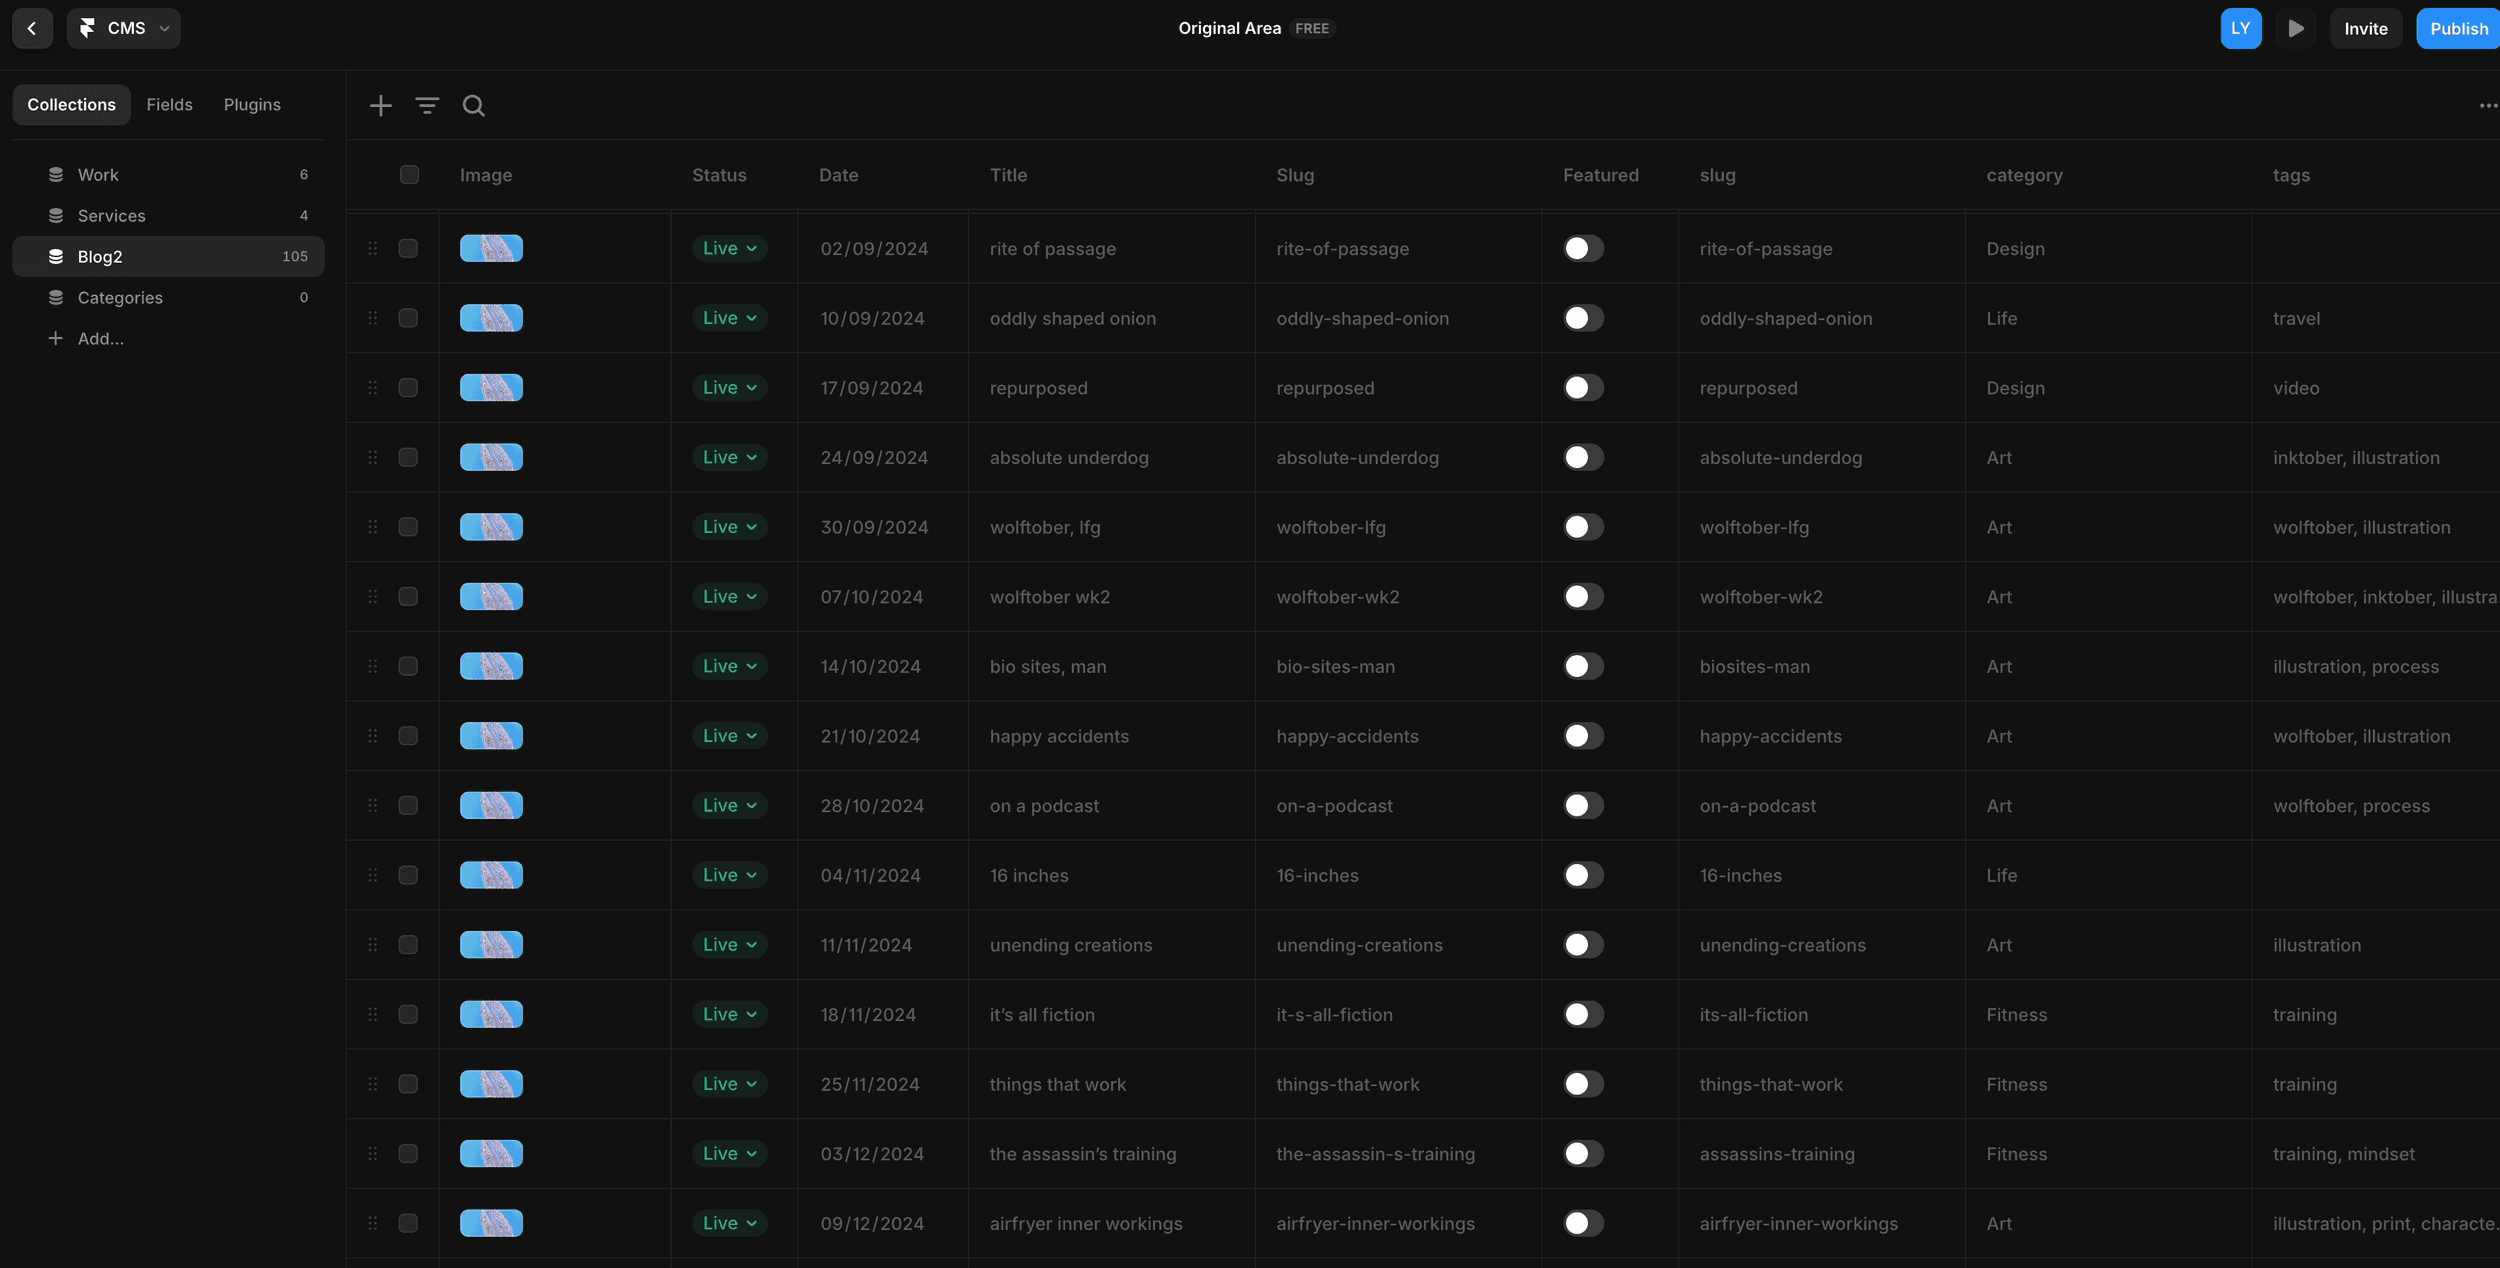
How my Framer Blog CMS looks like
6. Leverage through the CSV & CMS
Specific to Framer, you’re able to create templates, sections and components that can be linked directly to your CSV data via the CMS. If you enjoy design coherence and structural integrity, this tip is going to simplify your process anytime you decide to do an A/B test or duplicate complex layouts.
Below is an example of a visual system I’ve built with it for my blog:
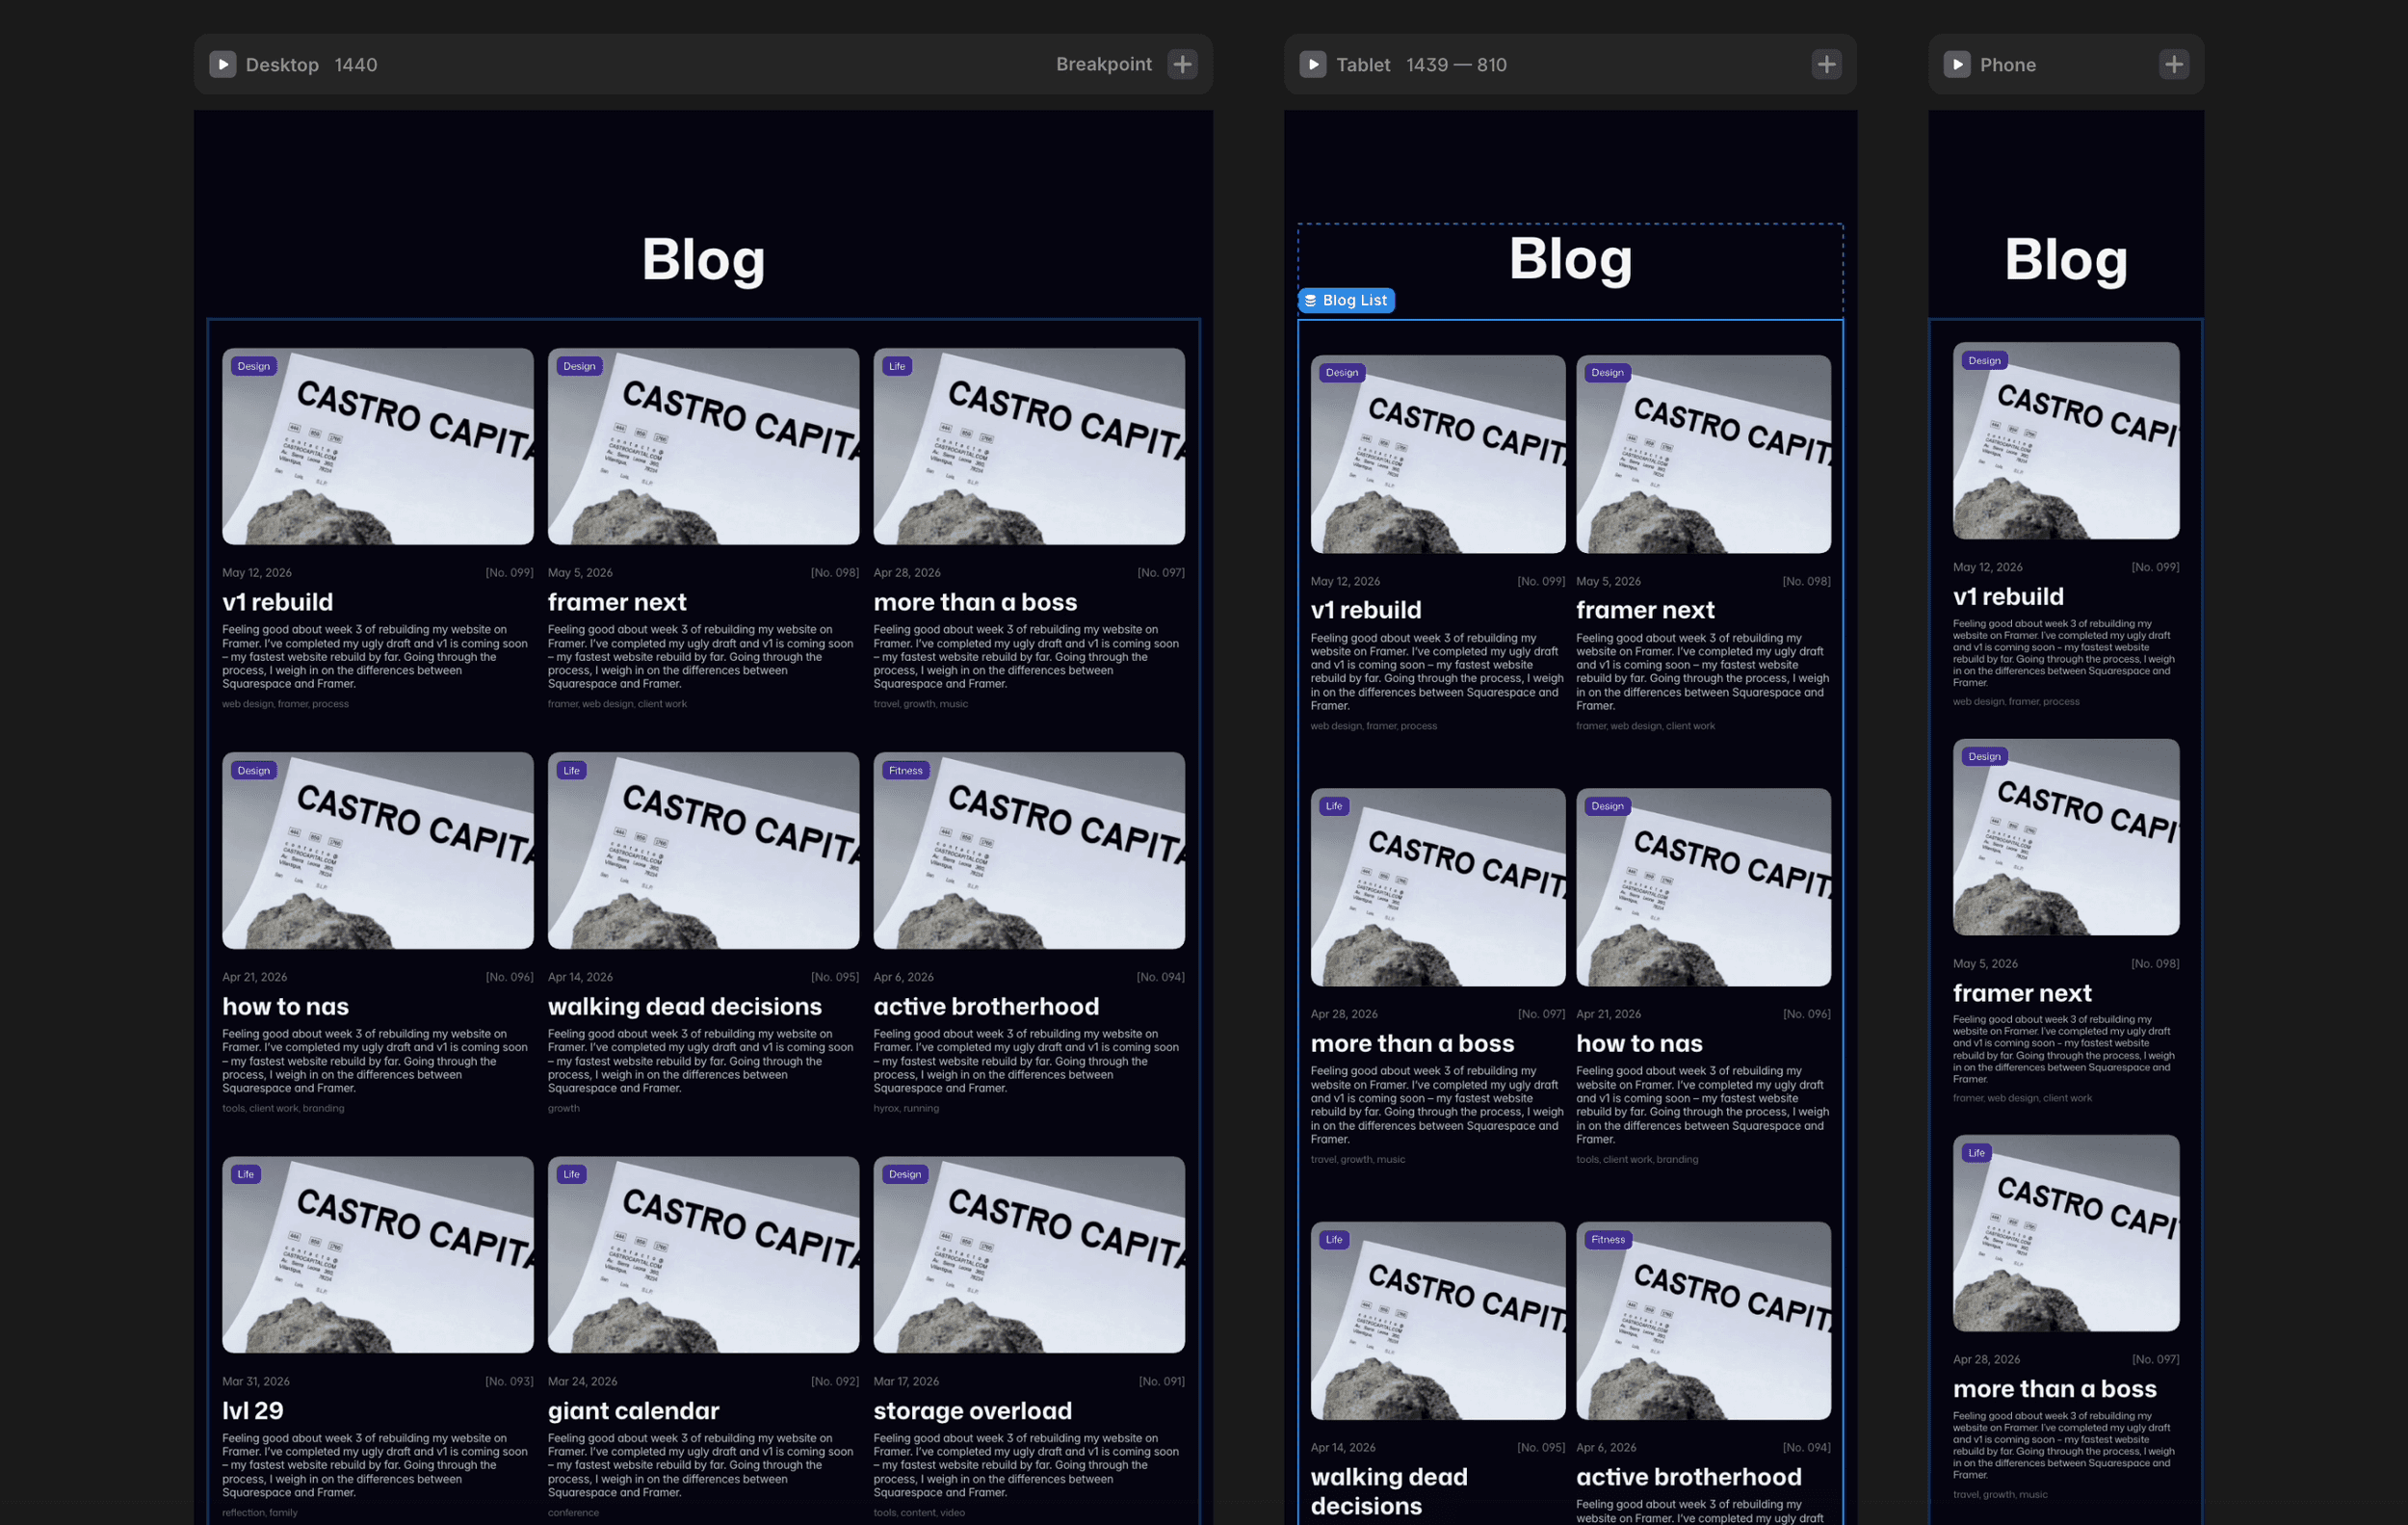
v1 of my blog post system across different breakpoints
And there you have it. Migrating your content from Squarespace to Framer in 6 easy steps. Technically, 4 cause steps 5 and 6 depends on how much effort you wanna put into it.