
[No. 096]
Design
tools, client work, branding


Me reading the NAS manuals
So… I decided to build my own private cloud
There's a moment every creative hits their hardware’s storage limits and subscription fees stop making sense. Google One. Dropbox. iCloud. WeTransfer. You don't notice it at first cause each one feels necessary. Until you do the math and realise you're paying monthly rent… forever. For storage you don't even own. Wth? That’s like having a rented garage attached to your house.
Some context: I run a one-man brand strategy and design studio, working with founders on brand identity, websites, digital presence, etc. And somewhere between juggling client files across three different cloud platforms and my growing content files, I decided to find a better solution.
What I found is called a NAS. And it’s changing how I think about running my business.
Ok, what even is a NAS?
NAS stands for Network Attached Storage. It’s basically your own personal cloud: a small computer that sits in a corner, stores your files, and gives you access to them from anywhere in the world. No monthly fee. No preset storage limits. No company holding your data hostage and feeding their AIs. All of which made me say yes.
One thing I realised though was that almost every NAS video I watched was made by a tech guy, for tech guys. But this one worked for me. Nothing against the tech guys, I just couldn't find a video that approached this from a creative entrepreneur's perspective. So, I documented my process.
What I built and what it cost
Total spend: just over RM5,000. One time. No monthly fee. Ever.
Here's the full breakdown:
UGREEN NASync DXP4800 Plus (RM2,650): The brain of the operation. Four drive bays, Intel Pentium Gold processor, 8GB DDR5 RAM, 10GbE network port, two M.2 NVMe slots, runs its own operating system called UGOS. Solid hardware for a first-generation NAS product.
2x Seagate IronWolf 4TB (RM639 each): The storage. Running them in RAID 1, both drives mirror each other simultaneously. If one fails, nothing is lost. It's not a backup strategy on its own, but it's protection against drive failure. Trying to implement the 3-2-1 backup rule so this is a good start.
Kingston NV3 500GB NVMe (~RM500): Slots inside the NAS into one of the M.2 slots. Acts as an SSD cache, frequently accessed files load from this fast drive instead of the slower spinning HDDs. Night and day difference for day-to-day use.
CyberPower VP1000EILCD UPS (~RM450): An Uninterruptible Power Supply (UPS). This is the piece most people skip and shouldn't. It's a battery backup that keeps the NAS running during a power cut long enough for it to shut down safely without corrupting data. I was going to skip it too but I read some horror stories on lost storage during a power outage so I got the VP1000EILCD. It has an LCD display, USB communication port so the NAS can detect outages automatically, and delivers ~80 minutes of runtime at the load my NAS draws.
TP-Link TL-WPA7617 Powerline Adapter Kit (~RM300): My router is in a different room and rather than running ethernet cables through walls, I got the powerline adapters to send the network signal through the walls. That way, the NAS connects via ethernet to the adapter in my room, which connects back to the router. I didn’t wanna drill holes so this was the cleanest solution I found.
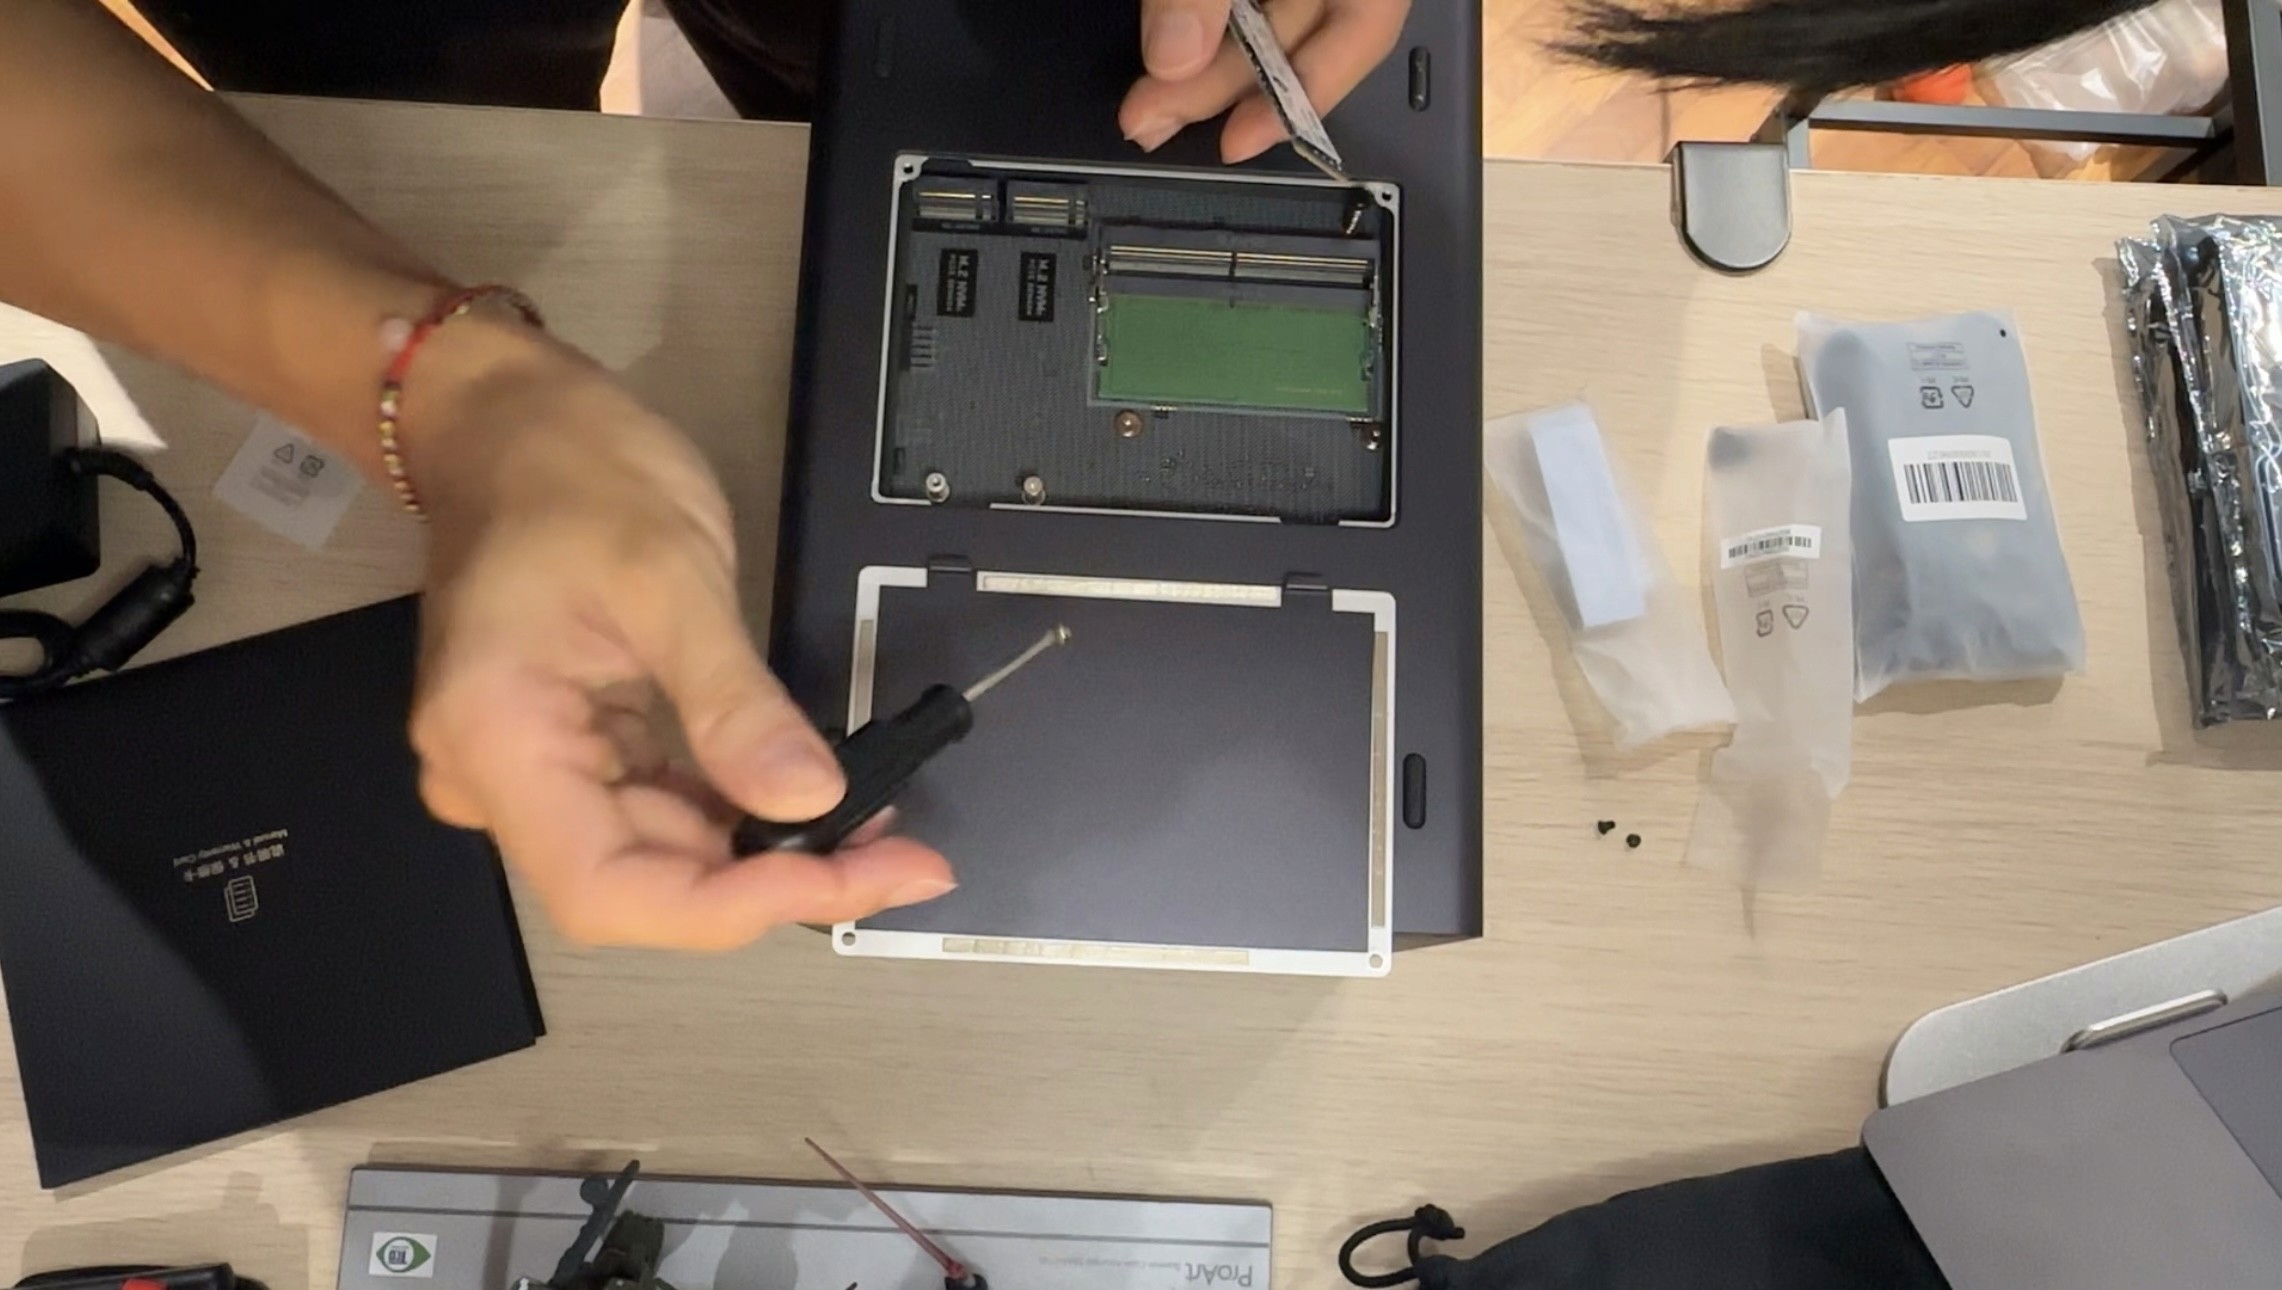
Screwing the hardware into place
The Build
To be clear, I am not a tech guy. I'm just a designer who got curious. Going into this I didn't know what RAID was. I didn't know what a sine wave was. I didn't know the difference between an IEC C13 and a C14 connector, did you know about the male and female differences? But yes, figuring that out took longer than I'd like to admit.
Physical assembly was straightforward. The IronWolf drives slot into the bays tool-free – push, click, done. The NVMe goes into the M.2 slot on the motherboard with one small screw, screwdriver included. Apply the thermal pad for heat dissipation, close it up, connect the ethernet, plug into the UPS, power on. One thing to note about CyberPower’s UPS is that for the VP1000EILCD, there are no 3-pin sockets, only C13 and C14 ports. This means that you’ll have to buy a C13/14 adapter to whatever device you wanna use. I had to get a C14 male to C5 female for my NAS’ power adapter.
UGOS loads in your browser like a website. You type in the NAS's IP address, set up your storage pool, configure RAID 1, change your admin credentials, enable two-factor authentication. The interface is clean and modern, not the clunky enterprise software I was expecting.
Network security took a separate session entirely. Securing the TIME router, configuring the powerline adapter, setting up WPA2/WPA3 encryption, disabling remote management, the works.
What it does
A NAS isn't just storage. Once it's running it becomes a personal server, and a personal server can run software. I haven’t installed all of them yet, but here are some useful apps I’ve noted:
Nextcloud: a private file sharing platform. Instead of sending files via WeTransfer or Google Drive, I can send them a link directly from my NAS. Professional, private, no size limits, no expiry.
n8n: an automation engine that runs via Docker. One way I’m thinking to implement this is by having clients fill out an intake form, n8n automatically creates a project brief, sends a welcome email, pings me on my phone. Less manual work.
Immich: a self-hosted Google Photos alternative. Every photo backs up automatically without storage warnings.
Vaultwarden: a self-hosted password manager. Self-explanatory lol.
Tailscale: a free VPN tool that lets me access my NAS securely from anywhere in the world without exposing any ports to the internet. This one’s cool cause I could be in Australia pulling files from my NAS in KL like it's a local drive. No more carrying around vital data while travelling – woo!
Worth It?
If you're a creative, freelancer, or a business owner who's been feeling like your tools are working against you with subscriptions, storage limits, and data you don't actually control… I believe a NAS is worth considering.
It takes a weekend to set up properly and there's definitely a learning curve. But once it's running, it runs. And it's yours.
Total spend: just over ~RM5,000. Monthly subscriptions cancelled: Google One, Dropbox, WeTransfer.
Time to set up: one weekend.
Worth it? I believe so, but time will tell for sure.